2:23
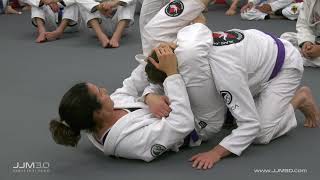
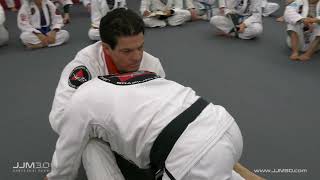
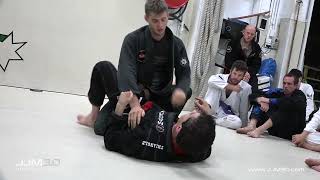
The Mount - Transition to Back Control and Choke
JeanJacquesMachado
2:48
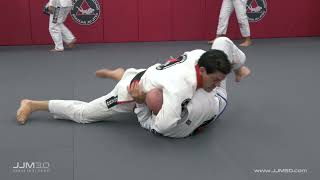
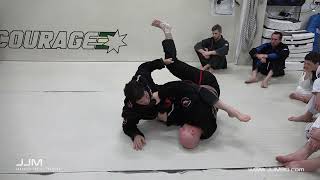
Back Control to Mount
2:42
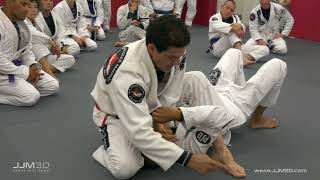
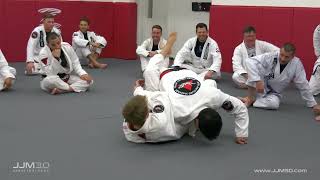
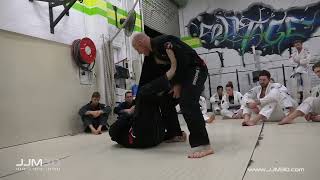
The Mount and The Back - Creating Openings To Attack
1:11
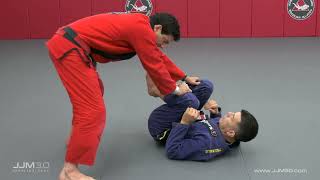
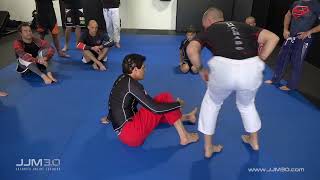
Back Control - Engaging Your Legs and Hips
3:52
Passing the Guard - Engaging The Hips
0:57
Passing The Guard - Creating Angles to Engage The Hips
1:05
Passing the Guard - The Leg Drag
1:07
Passing The Guard - Kick Step Leg Drag
2:56
The Guard - Tactics For Retention
2:44
The Butterfly Guard - Creating Space
1:48
Q&A : Side Control - Escaping The Knee On Stomach (With Lapel Control)
5:18
Q&A : Side Control - Escaping Reverse Kesa Gatame
0:53
Q&A: Side Control - Freeing the Inside Elbow (Details)
2:51
Q&A : Side Control - Escaping Cross Face Collar Control
2:35
Q&A : Side Control - Defending Against Lapel Control
3:26
Q&A: Side Control - Freeing the Inside Elbow
4:26
Q&A : Side Control - Escaping The North South Position
0:45
Q&A : Side Control - Escaping The Knee On Stomach (Elbow to Knee)
2:04
Q&A : Side Control - Escaping The Knee On Stomach (When Opponent has Belt and Collar Grip)
5:06
Q&A : Side Control - Escaping Far Arm Trap Cross Face Control
1:55
Q&A : Side Control - Defending And Escaping Head Arm Choke
2:43
Q&A : Side Control - Defending And Escaping Inside Hip Control
3:00
Q&A : Side Control - Escaping When Arms Pinned High On Chest & Darce Defense
4:53
Q&A : Side Control - Troubleshooting the Paper Cutter Choke
3:07
Q&A : Half Guard - Creating Space Underneath
5:30
Q&A : Side Control - Escaping Kesa Gatame
2:08
Q&A : Side Control - Defending And Escaping Seat Belt Control
3:21
Q&A : Side Control - Defending Against Arm Lock & Transitioning To North South
1:10
Q&A : Side Control - Troubleshooting the Entry Into The Paper Cutter Choke
5:04
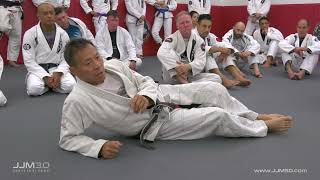
Jean Jacques Machado says "base" all the time. What is it? Finally explained.
1:58
Self- Defense: Defending Against The Wrist Grab And Takeaway
1:46
Self- Defense: Defending Against The Shoulder Grab And Takeaway
1:52
Self- Defense: Defending Against Shoulder Grab And Takeaway (Variation)
2:09
Self- Defense: Defending The Two Handed Front Strangle Hold
Self- Defense: Defending The Two Handed Front Strangle Hold (Variation)
1:14
Self- Defense: Defending The Two Handed Front Lapel Hold
0:56
Self- Defense: Defending The Two Handed Front Lapel Hold (Variation)
2:01
Self- Defense: Defending Against Push To The Chest
1:08
Self- Defense: Defending Against Rear Chokehold
2:53
Self- Defense: Defending Against Front Bearhug Arms Pinned
1:38
Self- Defense: Defending Against Front Bearhug Arms Free
Self- Defense: Defending Against Front Head Lock
1:35
Self- Defense: Defending Against Front Head Lock (Variation)
Self- Defense: Defending Against Side Head Lock (w Strikes)
Self- Defense: Defending Against Side Head Lock (No Strikes)
3:36
Self- Defense: Defending Against Head Lock On The Ground
2:58
Self- Defense: Defending Against Head Lock On The Ground (Variation)
3:20
The DEFINITIVE hook sweep instructional
4:13
The Butterfly Guard - Transition to Crucifix/Back Control
0:55
The Butterfly Guard - Transition to Crucifix (Details)
3:06
Open Guard To Triangle Choke
2:17
Your triangle will thank you for watching this detail
Troubleshooting The Triangle Choke - Defending The Stack (Variation)
0:52
The Triangle Choke - Transition To The Arm Bar
2:24
The Triangle Choke - When To Attack The Arm Or The Neck
3:04
The Sitting Guard (With Foot On Hip)
0:37
The Sitting Guard - The Collar Drag
2:59
The Closed Guard - Maintaining Control
1:39
The Closed Guard - Hand Control
4:57
The Closed Guard - Defending Hip Pressure & How To Secure The First Collar Grip
9:31
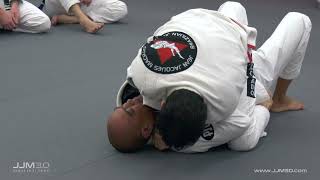
The Mount - The Cross Collar Choke MasterClass
1:40
The Mount - The Arm Bar
2:31
The Mount - Countering The Bridge and Roll
1:57
The Mount - Opening Up The Elbow
The Mount - Initiating the Attack
The Mount - "Turn The Lights Off"
4:07
The Closed Guard - Elevating the Hip
4:11
The Arm Bar From The Closed Guard - Master Class (Part 1)
6:53
The Arm Bar From The Closed Guard - Master Class (Part 2)
6:13
The Arm Bar From The Closed Guard - Master Class (Part 3)
2:52
The North South Position - Securing The Elbow
The North South Position - Securing The Elbow & Submission Options
2:12
The Kimura From North South
4:16
Back Control - Maintaining Control
Back Control - Transition to the Mount
0:54
Back Control - Troubleshooting The Transition to the Mount
3:17
Back Control - Regaining Control From Escape Attempt
5:47
Back Control - Securing Collar Control
Escaping Back Control - Concepts and Principles
2:19
Escaping Back Control - Defending Against The Choke
3:45
Escaping From The Mount - Hand In The Collar
Escaping From The Mount - Framing Off The Hip
Escaping From The Mount - Framing Off The Hip (Troubleshooting)
3:44
Q&A : Passing the Lasso/Spider Guard
3:15
There is no rule saying you have to pass the guard.
2:34
Q&A : Preventing The Mount From Side Control Bottom
2:18
Q&A : Escaping The Crucifix
2:30
Q&A : Passing the Open Guard Against A Larger Opponent
1:42
Q&A : Protecting Your Arms While Someone Is In Your Guard
3:59
Q&A : Escaping Back Control (Single Leg Dominant)
4:45
Q&A : Defending Z Guard Pass (Opponent Holds Belt)
3:53
Choke From Half Guard Top
1:31
Choke From Half Guard Top (Troubleshooting)
Choke From Turtle Top
Loop Choke From Sitting Guard
5:28
Troubleshooting The Loop Choke From The Sitting Guard
2:10
Troubleshooting The Loop Choke From The Sitting Guard - Sealing The Choke
5:01
Loop Choke From Sitting Guard - Variation
Defending The Loop Choke
Defending the Arm In Guillotine Choke
3:27
Preventing the Loop Choke
4:03
Principles of Head Positioning & Attacking From The Back
Troubleshooting The Reverse Triangle From The Bottom
13:36
Troubleshooting Passing The X Guard & Closing Comments
1:16
Troubleshooting The Arm Bar From Back Control
Inside The Closed Guard Master Class - Part 1
3:43
Inside The Closed Guard Master Class - Part 2
Half Guard to Mount
Half Guard Defense against Heavy Pressure
Reverse Half Guard Defense And Escape
Open Guard Passing Drill
6:20
Opening Speech & Escaping the Mount
3:42
Escaping From The Mount - How to Move The Hips More Efficiently
Escaping From The Mount - Framing Off The Hip (Close Up)
Escaping From The Mount When Your Legs Are Entangled
2:27
Maintaining Closed Guard
The Closed Guard - 3 Options to Break Your Opponents Posture
The Closed Guard - The Flower Sweep
2:22
The Closed Guard - The Omoplata
The Closed Guard - The Triangle Choke (Cross Grip)
1:17
Finishing The Triangle Choke - Connecting The Hip
4:19
The Collar Drag - 3 Options
6:58
Q&A : Concepts & Strategies When Being Pinned In Side Control
4:00
Q&A : Escaping The Triangle Choke (2 Options)
Q&A : Maintaining Good Posture Inside The Closed Guard
2:57
Q&A : Concepts & Strategies For Passing The Butterfly Guard
3:08
Q&A : Concepts & Strategies For Maintaining The Knee On Stomach
5:27
The Half Guard - Securing The Under Hook
The Half Guard - Securing The Butterfly Hook When The Top Person Posts Their Foot
1:43
Troubleshooting The Hook Sweep
1:23
Butterfly Hook Elevation Drill
2:05
Half Guard Transition To Hook Sweep
1:59
The Half Guard - Utilizing The Knees To Create Space
Q&A : Half Guard - Defending The Heavy Cross Face
2:36
Q&A : Half Guard - Defending Against Heavy Head/Chest Pressure
6:17
Q&A : Half Guard - Creating Space When Opponent Controls Hips
3:23
The Closed Guard - Engaging Your Hips For Better Control
2:25
The Closed Guard - Arm Bar Drill
2:37
Arm Bar from Closed Guard Drill - Isolating the Outside Elbow
0:36
Arm Bar from Closed Guard Drill - Both Feet On Hip
Arm Bar from Closed Guard - Double Knee Frame
1:36
The Arm Bar From The Closed Guard - Defending Against The Stack
The Closed Guard - The Collar Drag
1:50
Open Guard Drill - Lapel Control
The Butterfly Guard - Hook Sweep with Over Hook
Proper control comes from proper body movement
2:32
Side Control To Back Control With Arm Bar
3:14
Front Turtle To Back Control With Choke
1:54
Attacking The Turtle Position - Guillotine Choke
Attacking The Turtle Position - Arm Trap To Rear Naked Choke
1:51
Troubleshooting The Arm Trap To Rear Naked Choke Turtle Attack
1:49
Attacking The Turtle Position - The Tripod Choke
Attacking The Turtle Position - Arm In Guillotine To Back Control To Choke
Attacking The Turtle Position - The Banana Split
Attacking The Turtle Position - The Twister
2:00
The Butterfly Guard - Attacking The Arm Drag From The Over Hook
2:06
The Arm Drag From The Sitting Guard
3:05
The Butterfly Guard - Double over Hook Sweep To Omoplata
The Sitting Guard - Guard Pass Defense To Front Choke
Attacking The Turtle Position - The Peruvian Necktie
Closed Guard Leg On Shoulder Arm Bar
2:21
Closed Guard Wrist Controlled Triangle Choke
The Butterfly Guard - Hand in The Pocket Hook Sweep
1:24
Arm Bar Defense Counter
Closing Speech
Maintaining Strong Posture Inside The Closed Guard
2:11
Opening The Closed Guard
1:33
Passing The Guard - Knee Slice Drill
2:15
Opening The Closed Guard - Blocking The Knee
3:46
1:12
2:28
Pressure Passing - Concepts & Principles
1:18
Passing The Guard - Pinning The Bottom Knee
2:41
Lapel Assisted Butterfly Guard Pass
3:11
Passing The Spider Guard Drill
Passing The Spider Guard Drill - Hand Angling
Passing The Butterfly Guard - Spin Pass
1:01
Passing The Sitting Guard
1:41
Passing The Guard Drill - Both Feet On Hips
0:58
Passing the Butterfly Guard - Defending 2 on 1/Belt Control
1:56
Passing the Butterfly Guard - Double Hook Block
Passing the Butterfly Guard - Windshield Knee Pass
0:46
Passing the Butterfly Guard - Windshield Knee Pass (Details)
0:47
Passing the Butterfly Guard - The Step Over
2:29
The Closed Guard - Engaging Your Hips
The Closed Guard - Engaging Your Legs
The Closed Guard - Engaging The Initial Collar Grip
Securing The Cross Collar Choke
1:25
Passing The Butterfly Guard - Maintaining A Proper Frame From The Top
Passing The Butterfly Guard - Maintaining Base And Defending Against The Hooks
Passing the Double Under Hook Butterfly Guard
1:30
Passing The Butterfly Guard - Hand Post
Passing The Butterfly Guard - Defending The Elevation
1:26
Foot Lock Defense To Toe Hold
3:16
Open Guard Sweep Against Standing Opponent - Details On Protecting Your Feet
1:22
Open Guard Sweep To Straight Foot Lock
2:16
Open Guard Sweep To Arm Lock
Reversal from Z Guard (2 on 1 Control)